Welcome to the Python Project based learning. We will walk you through the creation of a Python-based quiz game designed to test your knowledge of different languages. This project not only serves as a fun way to learn and practice languages but also introduces some core programming concepts in Python, such as procedural programming, functions, and control flow.
We’ll begin by exploring the basic structure of the project, including how to set up a simple graphical user interface (GUI) using the Tkinter library. You’ll learn how to define and call functions, handle user input, and manage control flow with if-else statements.
As we dive deeper, we’ll cover more advanced topics like capturing user input through the webcam, displaying and updating quiz questions, and saving quiz results to a CSV file for future reference. By the end of this guide, you’ll have a fully functional Python quiz game, complete with features like user profile registration, scoring, and even saving wrong answers for review.
This project is perfect for beginners looking to enhance their Python skills while building a practical and interactive application. Whether you’re a language enthusiast or just interested in learning more about Python, this article will guide you step-by-step through the process of creating your own quiz game.
Contents
Basic Python
Topic 1: Python IDLE and Control Flow
1.1 Introduction to Python IDLE
Python IDLE Usage

Python’s Integrated Development and Learning Environment (IDLE) is an essential tool for beginners and seasoned developers alike. It provides a simple and interactive way to write, test, and debug Python code. When you open IDLE, you’re greeted with the Python Shell(no 1. in the above image)—a command-line interface where you can enter Python commands and see immediate results. This is particularly useful for testing small snippets of code or experimenting with Python’s syntax.
IDLE also comes with a built-in text editor for writing longer scripts or programs. This editor supports syntax highlighting, indentation, and offers the ability to save and open Python files with a .py extension. The editor is where you’ll likely spend most of your time when working on more complex projects, as it allows you to write, save, and execute Python scripts with ease.
To run a script from the editor, simply press F5, and the code will execute in the Python Shell, displaying any output or errors.
File Editor and Directory Management
When working with Python files in IDLE or any other editor, understanding file paths and directory management is crucial. A file path specifies the location of a file or directory in your system’s file structure. Python can interact with files and directories using both absolute and relative paths.
- Absolute Path: This is the full path to a file or directory, starting from the root of your file system. For example,
C:\Users\YourUsername\Documents\project\script.pyis an absolute path on a Windows system. - Relative Path: This is a path relative to the current working directory. If your script is in the same directory as a file you’re trying to access, you can use a relative path like
./data.csv, where.refers to the current directory.
In Python, you can easily manipulate file paths using the os module, which provides functions to interact with the file system. For instance, os.path.join() is used to concatenate directory and file names in a way that is safe and compatible with different operating systems.
1.2 Control Flow: if, else, for, while
Objective: Understand the basic control flow structures in Python.
- if, elif, else Statements
if...else statements are used for conditional execution of code blocks. These statements allow the program to execute certain sections of code based on whether a condition evaluates to True or False.
Here’s a breakdown of how if...else statements work:
Basic Structure
ifStatement: Theifstatement checks a condition. If the condition evaluates toTrue, the block of code inside theifstatement is executed.
if condition:
    # Code to execute if the condition is True
else Statement: The else statement follows an if statement and executes a block of code if the if condition is False.
if condition:
    # Code to execute if the condition is True
else:
    # Code to execute if the condition is False
elif Statement: The elif (short for else if) statement allows you to check multiple conditions. It must follow an if statement and can be used before an else statement.
if condition1:
    # Code to execute if condition1 is True
elif condition2:
    # Code to execute if condition1 is False and condition2 is True
else:
    # Code to execute if both condition1 and condition2 are False
Example Usage
Here’s an example that demonstrates how to use if, elif, and else statements:
age = 18

if age < 13:
    print("You are a child.")
elif age < 20:
    print("You are a teenager.")
else:
    print("You are an adult.")
In this example:
- If
ageis less than 13, it will print “You are a child.” - If
ageis 13 or greater but less than 20, it will print “You are a teenager.” - If
ageis 20 or greater, it will print “You are an adult.”
Nested if...else Statements
You can also nest if...else statements inside other if...else statements to check more complex conditions.
age = 25
if age < 18:
    print("You are a minor.")
else:
    if age < 65:
        print("You are an adult.")
    else:
        print("You are a senior.")
In this example:
- If
ageis less than 18, it prints “You are a minor.” - If
ageis 18 or greater but less than 65, it prints “You are an adult.” - If
ageis 65 or greater, it prints “You are a senior.”
Logical Operators
Python provides several logical operators that are used to perform logical operations. These operators are primarily used to combine conditional statements and control the flow of logic in your code. The main logical operators in Python are:
- and
- or
- not
Here’s a detailed explanation of each:
“and” Operator
The and operator returns True if both operands are true. If either of the operands is False, it returns False.
Syntax:
result = expression1 and expression2
a = True
b = False

print(a and b)  # Output: False
print(a and True)  # Output: True
“or" Operator
The or operator returns True if at least one of the operands is true. If both operands are False, it returns False.
Syntax:
result = expression1 or expression2
a = True
b = False

print(a or b)  # Output: True
print(b or False)  # Output: False
“not” Operator
The not operator is a unary operator that inverts the truth value of the operand. If the operand is True, it returns False, and if the operand is False, it returns True.
Syntax:
result = not expression
a = True
b = False

print(not a)  # Output: False
print(not b)  # Output: True
Combining Logical Operators
You can combine multiple logical operators to form complex logical expressions.
Example:
a = True
b = False
c = True

result = (a and b) or (not c)
print(result)  # Output: False
Operator Precedence
The precedence of logical operators in Python is as follows:
notandor
This means that not is evaluated first, then and, and finally or.
Example:
a = True
b = False
c = True

result = a or b and not c
print(result)  # Output: True
In the above example, not c is evaluated first (False), then b and False (False), and finally a or False (True).
Practical Examples
Example 1: Checking Multiple Conditions
age = 25
has_license = True

if age >= 18 and has_license:
    print("You can drive.")
else:
    print("You cannot drive.")
Example 2: Default Value with or
name = ""

print(name or "Default Name")  # Output: Default Name
Understanding and using logical operators effectively allows you to control the flow of your program and make complex decisions based on multiple conditions.
Let’s integrate logical operators into your code to check multiple conditions more effectively. Here’s the updated version of the code with comments explaining how logical operators are used:
# Ask the user for their age
age = int(input("What is your age? "))

# Check the age and respond accordingly
if age < 19:
    # If age is less than 19
    print("You're a teen! Don't worry, acne is temporary!")
elif 19 <= age <= 29:
    # If age is between 19 and 29 inclusive
    print("You're in your 20s! Enjoy the best years of your life!")
elif 30 <= age <= 39:
    # If age is between 30 and 39 inclusive
    print("You're in your 30s! Time to start using anti-aging cream!")
elif 40 <= age <= 49:
    # If age is between 40 and 49 inclusive
    print("You're in your 40s! Life begins at 40, they say!")
elif 50 <= age <= 59:
    # If age is between 50 and 59 inclusive
    print("You're in your 50s! Embrace the wisdom that comes with age!")
elif age >= 60:
    # If age is 60 or older
    print("You're 60 or older! You've got a lifetime of stories to tell!")
else:
    # If age doesn't fall into any of the above categories
    print("That's an interesting age!")

# Example of using logical operators to combine conditions
# Let's say we want to give a special message to those in their 20s or 30s
if (19 <= age <= 29) or (30 <= age <= 39):
    # If age is between 19 and 29 inclusive, or between 30 and 39 inclusive
    print("You are in the prime of your life!")

# Example of using logical operators to exclude certain age groups
# Let's give a different message if the user is not a teen and not in their 20s
if (age < 19) or (age > 29):
    # If age is less than 19, or greater than 29
    print("You are not in your teens or twenties!")
Explanation:
- Original Age Checks with
elif:- The
elifstatements are used to check for specific age ranges. Each condition checks ifagefalls within a particular range. - For example,
elif 19 <= age <= 29uses the<=operator to check if the age is between 19 and 29 (inclusive).
- The
- Combining Conditions with
or:- The line
if (19 <= age <= 29) or (30 <= age <= 39):uses theoroperator to combine two conditions. This condition checks if the age is either in the 20s or the 30s and prints a special message if true.
- The line
- Excluding Age Groups with
or:- The line
if (age < 19) or (age > 29):uses theoroperator to check if the age is either less than 19 or greater than 29. If either condition is true, it prints a message indicating that the user is not in their teens or twenties.
- The line
Using logical operators like and, or, and not allows you to create more complex and flexible conditions in your code. This is especially useful for combining multiple checks or excluding specific groups based on certain criteria.
You can use logical operators (and, or, not) to combine multiple conditions in an if statement.
age = 30
is_student = False

if age < 18 or is_student:
    print("You are eligible for a student discount.")
else:
    print("You are not eligible for a student discount.")
In this example:
- If
ageis less than 18 oris_studentisTrue, it prints “You are eligible for a student discount.” - Otherwise, it prints “You are not eligible for a student discount.”
These basic principles and examples should give you a good understanding of how to use if...else statements in Python to control the flow of your programs.
# Ask the user for their age
age = int(input("What is your age? "))

# Check the age and respond accordingly
if age < 19:
    print("You're a teen! Don't worry, acne is temporary!")
elif 19 <= age <= 29:
    print("You're in your 20s! Enjoy the best years of your life!")
elif 30 <= age <= 39:
    print("You're in your 30s! Time to start using anti-aging cream!")
elif 40 <= age <= 49:
    print("You're in your 40s! Life begins at 40, they say!")
elif 50 <= age <= 59:
    print("You're in your 50s! Embrace the wisdom that comes with age!")
elif age >= 60:
    print("You're 60 or older! You've got a lifetime of stories to tell!")
else:
    print("That's an interesting age!")
Procedural Programming and Functions
There are many programming techniques but for the beginner level procedural programming is easier way of learning. Here we will start with procedural programming before transitioning to Object Oriented programming(OOP).
The core of procedural programming. A procedure is a set of instructions that performs a specific task. Procedures can take inputs (parameters), perform operations, and return outputs.
Defining and Calling Functions
Objective: Understand how to define and call functions in Python.
- Introduction to Functions
- Purpose and advantages of using functions.
# Define a function to describe the Tesla car
def describe_tesla(model, year, battery_size):
    return f"{year} Tesla {model} with a {battery_size}-kWh battery"

# Define a function to calculate the range based on battery size
def calculate_range(battery_size):
    if battery_size == 75:
        return 326
    elif battery_size == 100:
        return 405
    else:
        return "Unknown range"

# Define a function to print the range of the Tesla car
def print_range(model, battery_size):
    range_miles = calculate_range(battery_size)
    if isinstance(range_miles, int):
        print(f"The {model} can go approximately {range_miles} miles on a full charge.")
    else:
        print(f"The range for the {model} with a {battery_size}-kWh battery is unknown.")

# Define the main function to execute the procedures
def main():
    # Define Tesla car details
    model = "Model Y"
    year = 2024
    battery_size = 100

    # Describe the Tesla car
    description = describe_tesla(model, year, battery_size)
    print(description)

    # Print the range of the Tesla car
    print_range(model, battery_size)

# Call the main function
if __name__ == "__main__":
    main()
- Function Definitions:
describe_tesla: Takes the model, year, and battery size as inputs and returns a string describing the Tesla car.calculate_range: Takes the battery size as input and returns the range in miles based on the battery size. It handles specific cases for 75 kWh and 100 kWh batteries.print_range: Takes the model and battery size as inputs, calculates the range usingcalculate_range, and prints the range information.
- Main Function:
main: The main function defines the details of the Tesla car (model, year, battery size), callsdescribe_teslato get the description, and prints it. Then, it callsprint_rangeto print the range of the Tesla car.
- Function Calling:
- The
mainfunction is called at the end of the script if the script is run as the main module (if __name__ == "__main__":). This is a common practice in Python to ensure that the main function runs when the script is executed directly.
- The
This example illustrates how procedural programming can be used to organize and execute code related to a Tesla car without using classes or objects. Each function performs a specific task, and the main function coordinates these tasks to achieve the desired output.
Let’s convert the procedural example into an Object-Oriented Programming (OOP) example. In this OOP version, we’ll create a TeslaCar class that encapsulates the car’s properties and methods.
# Define the TeslaCar class
class TeslaCar:
    def __init__(self, model, year, battery_size):
        self.model = model
        self.year = year
        self.battery_size = battery_size

    def describe(self):
        return f"{self.year} Tesla {self.model} with a {self.battery_size}-kWh battery"

    def calculate_range(self):
        if self.battery_size == 75:
            return 326
        elif self.battery_size == 100:
            return 405
        else:
            return "Unknown range"

    def print_range(self):
        range_miles = self.calculate_range()
        if isinstance(range_miles, int):
            print(f"The {self.model} can go approximately {range_miles} miles on a full charge.")
        else:
            print(f"The range for the {self.model} with a {self.battery_size}-kWh battery is unknown.")

# Create an instance of TeslaCar
my_tesla = TeslaCar(model="Model Y", year=2024, battery_size=100)

# Call the methods on the instance
print(my_tesla.describe())  # Output: 2024 Tesla Model Y with a 100-kWh battery
my_tesla.print_range()      # Output: The Model Y can go approximately 405 miles on a full charge.
- Class Definition:
TeslaCarClass: Represents a Tesla car with attributes and methods.__init__Method: The constructor method that initializes themodel,year, andbattery_sizeattributes.describeMethod: Returns a string describing the Tesla car.calculate_rangeMethod: Calculates and returns the range based on the battery size.print_rangeMethod: Prints the range of the Tesla car using the result fromcalculate_range.
- Instance Creation:
- An instance of
TeslaCaris created with the model “Model Y”, year 2024, and battery size 100 kWh. This instance is stored in the variablemy_tesla.
- An instance of
- Method Invocation:
my_tesla.describe(): Calls thedescribemethod on themy_teslainstance to get the car description and prints it.my_tesla.print_range(): Calls theprint_rangemethod on themy_teslainstance to print the range information.
Key Differences from Procedural Programming:
- Encapsulation: The
TeslaCarclass encapsulates all the related properties (attributes) and behaviors (methods) of a Tesla car. This bundling of data and methods into a single unit (class) is a key feature of OOP. - Reusability and Modularity: The class provides a reusable blueprint for creating Tesla car objects, and each object can have its own state.
- Object Instances: The instance (
my_tesla) is created from theTeslaCarclass, and methods are called on this instance, maintaining the state and behavior specific to it.
This OOP approach organizes the code into a more modular and reusable structure, making it easier to manage and extend, especially as the program grows in complexity.
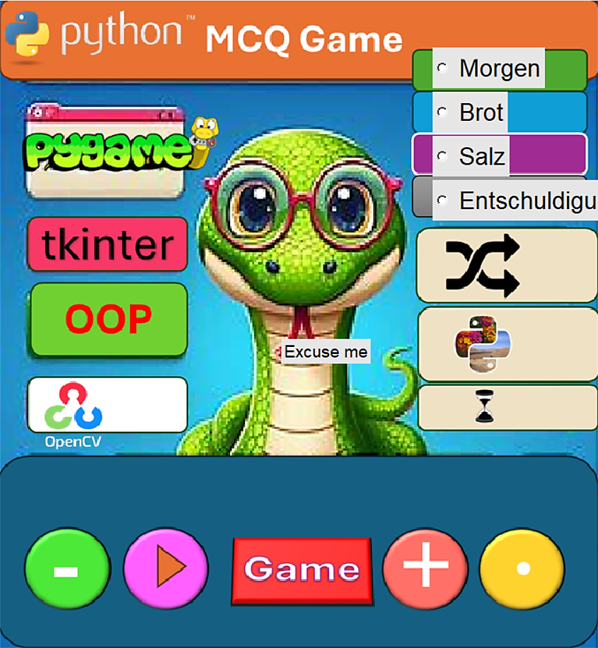
Project: Python MCQ Quiz Game
Now let’s explain the ‘Quiz Game‘ which is written in Object Oriented(OOP) programming.:

import os
import pandas as pd
import tkinter as tk
from tkinter import IntVar
import random
import cv2
from PIL import Image, ImageDraw, ImageFont
from datetime import datetime

class LanguageQuizGame:
    def __init__(self, root, quiz_file):
        self.root = root
        self.root.title("Language Quiz Game")

        # Add some styling
        self.root.geometry("700x400")
        self.root.config(bg="#e6e6e6")

        # User profile
        self.user_profile = {"Name": "", "Picture": None, "QuizResults": [], "WrongAnswers": []}

        # User registration
        self.register_user_profile()

        # Add a cool graphic
        self.logo_image = tk.PhotoImage(file="cg.png")
        self.logo_label = tk.Label(root, image=self.logo_image, bg="#e6e6e6")
        self.logo_label.place(x=50, y=10)

        # Load quiz data from CSV file with error handling
        try:
            self.quiz_data = pd.read_csv(quiz_file)
        except pd.errors.ParserError as e:
            print(f"Error reading {quiz_file}: {e}")
            return

        # Initialize quiz variables
        self.current_question_index = 0
        self.correct_answer = ""
        self.score = 0  # Initialize the score attribute

        # Quiz UI elements
        self.question_label = tk.Label(root, text="", font=("Arial", 14), bg="#e6e6e6", wraplength=300)
        self.question_label.place(x=370, y=395)

        self.options = []
        self.options_var = IntVar()
        for i in range(4):  # Increased to 4 options
            option = tk.Radiobutton(root, text="", variable=self.options_var, value=i, font=("Arial", 20), bg="#e6e6e6",
                                    command=self.check_answer, state=tk.NORMAL)
            option.place(x=541, y=65 + i * 50)
            self.options.append(option)

        self.update_question()

    def register_user_profile(self):
        user_name = input("Enter your name: ")
        self.user_profile["Name"] = user_name

        # Capture user picture using the webcam
        self.capture_user_picture()

    def capture_user_picture(self):
        cap = cv2.VideoCapture(0)
        ret, frame = cap.read()
        cap.release()

        if ret:
            timestamp = datetime.now().strftime('%d_%B_%Y_%H_%M_%S')  # Modified timestamp format
            formatted_timestamp = datetime.now().strftime('%dth of %B %Y time %H:%M:%S')
            # Specify the directory to save user images
            user_images_directory = r"C:\Users\Ahammed.Shoyeb\AppData\Local\Programs\Python\Python311\Code\Results"
            ##C:\Users\Ahammed.Shoyeb\AppData\Local\Programs\Python\Python311\Code

            picture_path = os.path.join(user_images_directory, f"user_picture_{self.user_profile['Name']}_{timestamp}.png")
            cv2.imwrite(picture_path, cv2.cvtColor(frame, cv2.COLOR_BGR2RGB))

            # Overlay timestamp on the image
            image_pil = Image.open(picture_path)
            draw = ImageDraw.Draw(image_pil)
            draw.text((10, 10), f"Name: {self.user_profile['Name']} | Time: {formatted_timestamp}", font=self.get_timestamp_font(), fill="purple")
            image_pil.save(picture_path)

            self.user_profile["Picture"] = picture_path
        else:
            print("Error capturing picture.")

    def get_timestamp_font(self):
        return ImageFont.load_default()  # You can customize the font here if needed

    def update_question(self):
        if self.current_question_index < len(self.quiz_data):
            current_question = self.quiz_data.iloc[self.current_question_index]
            self.correct_answer = current_question["German"]

            self.question_label.config(text=current_question["English"])

            incorrect_options = self.get_incorrect_options(self.correct_answer)
            incorrect_options.append(self.correct_answer)
            random.shuffle(incorrect_options)

            # Update the answer options and reset button states to NORMAL
            for i in range(4):  # Increased to 4 options
                self.options[i].config(text=incorrect_options[i], bg="#e6e6e6", state=tk.NORMAL)

            self.options_var.set(-1)
            self.current_question_index += 1
        else:
            self.show_final_score()

    def get_incorrect_options(self, correct_answer, num_options=3):
        incorrect_options = self.quiz_data[self.quiz_data['German'] != correct_answer]['German'].sample(num_options)
        return list(incorrect_options)

    def show_final_score(self):
        final_score_label = tk.Label(self.root, text=f"Final Score: {self.score}/{len(self.quiz_data)}", font=("Arial", 14),
                                      bg="#e6e6e6")
        final_score_label.place(x=300, y=300)

        # Save final score with user information
        timestamp = datetime.now().strftime('%d_%B_%Y_%H_%M_%S')  # Modified timestamp format
        formatted_timestamp = datetime.now().strftime('%dth of %B %Y time %H:%M:%S')
        result_filename = f"quiz_result_{self.user_profile['Name']}_{timestamp}.csv"

        final_score_info = {
            "Name": self.user_profile["Name"],
            "WebcamImage": f"Results/user_picture_{self.user_profile['Name']}_{timestamp}.png",
            "Score": self.score,
            "TotalQuestions": len(self.quiz_data),
            "Timestamp": formatted_timestamp
        }

        # Specify the directory to save result files
        result_directory = r"C:\Users\Ahammed.Shoyeb\AppData\Local\Programs\Python\Python311\Code\Results"

        # Construct the file path for the result file in the specified directory
        result_file_path = os.path.join(result_directory, result_filename)

        # Save to CSV
        df = pd.DataFrame([final_score_info])
        df.to_csv(result_file_path, index=False)

        self.user_profile["QuizResults"].append(final_score_info)

        # Save wrong answers to CSV in the desired format
        wrong_answers_filename = f"wrong_answers_{self.user_profile['Name']}_{timestamp}.csv"
        wrong_answers_file_path = os.path.join(result_directory, wrong_answers_filename)
        wrong_answers_df = pd.DataFrame(self.user_profile["WrongAnswers"], columns=["German", "English"])
        wrong_answers_df.to_csv(wrong_answers_file_path, index=False)

    def check_answer(self):
        selected_option = self.options_var.get()
        if selected_option >= 0:
            for i in range(4):  # Increased to 4 options
                self.options[i].config(state=tk.DISABLED)

            user_answer = self.options[selected_option]["text"]
            if user_answer == self.correct_answer:
                self.score += 1
                self.options[selected_option].config(bg="green")
            else:
                self.options[selected_option].config(bg="red")

                # Save wrong answer
                current_question = self.quiz_data.iloc[self.current_question_index - 1]
                self.user_profile["WrongAnswers"].append((self.correct_answer, current_question["English"]))

            self.root.after(1000, self.update_question)

if __name__ == "__main__":
    root = tk.Tk()
    app = LanguageQuizGame(root, quiz_file="gn.csv")
    root.mainloop()

import os
import pandas as pd
import tkinter as tk
from tkinter import IntVar
import random
import cv2
from PIL import Image, ImageDraw, ImageFont
from datetime import datetime
- These are the necessary module imports for the script.
os: For operating system related tasks such as file path manipulation.pandas as pd: For handling CSV data.tkinter as tkandtkinter.IntVar: For creating the GUI.random: For random operations, like shuffling the options.cv2: For capturing images using the webcam.PIL.Image, PIL.ImageDraw, PIL.ImageFont: For handling images and drawing text on images.datetime: For working with dates and times.
LanguageQuizGame Class
__init__ Method
class LanguageQuizGame:
    def __init__(self, root, quiz_file):
        self.root = root
        self.root.title("Language Quiz Game")

        # Add some styling
        self.root.geometry("700x400")
        self.root.config(bg="#e6e6e6")

        # User profile
        self.user_profile = {"Name": "", "Picture": None, "QuizResults": [], "WrongAnswers": []}

        # User registration
        self.register_user_profile()

        # Add a cool graphic
        self.logo_image = tk.PhotoImage(file="cg.png")
        self.logo_label = tk.Label(root, image=self.logo_image, bg="#e6e6e6")
        self.logo_label.place(x=50, y=10)

        # Load quiz data from CSV file with error handling
        try:
            self.quiz_data = pd.read_csv(quiz_file)
        except pd.errors.ParserError as e:
            print(f"Error reading {quiz_file}: {e}")
            return

        # Initialize quiz variables
        self.current_question_index = 0
        self.correct_answer = ""
        self.score = 0  # Initialize the score attribute

        # Quiz UI elements
        self.question_label = tk.Label(root, text="", font=("Arial", 14), bg="#e6e6e6", wraplength=300)
        self.question_label.place(x=370, y=395)

        self.options = []
        self.options_var = IntVar()
        for i in range(4):  # Increased to 4 options
            option = tk.Radiobutton(root, text="", variable=self.options_var, value=i, font=("Arial", 20), bg="#e6e6e6",
                                    command=self.check_answer, state=tk.NORMAL)
            option.place(x=541, y=65 + i * 50)
            self.options.append(option)

        self.update_question()
- Class Initialization (
__init__method):self.root = root: Sets the root window for the GUI.self.root.title("Language Quiz Game"): Sets the title of the window.- Styling the Window:
self.root.geometry("700x400"): Sets the window size.self.root.config(bg="#e6e6e6"): Sets the background color.
- User Profile Initialization:
self.user_profile: Initializes a dictionary to store user information.
- User Registration:
self.register_user_profile(): Calls the method to register the user.
- Adding a Graphic:
self.logo_image = tk.PhotoImage(file="cg.png"): Loads an image.self.logo_label = tk.Label(root, image=self.logo_image, bg="#e6e6e6"): Creates a label to display the image.self.logo_label.place(x=50, y=10): Places the label in the window.
- Loading Quiz Data:
self.quiz_data = pd.read_csv(quiz_file): Tries to load the quiz data from a CSV file.except pd.errors.ParserError as e: Catches any parsing errors.print(f"Error reading {quiz_file}: {e}"): Prints an error message.return: Exits the method if an error occurs.
- Initializing Quiz Variables:
self.current_question_index = 0: Initializes the question index.self.correct_answer = "": Initializes the correct answer.self.score = 0: Initializes the score.
- Quiz UI Elements:
self.question_label: Creates a label for displaying questions.self.question_label.place(x=370, y=395): Places the question label.self.options = []: Initializes the list for answer options.self.options_var = IntVar(): Creates an integer variable for the radio buttons.- Creating Answer Options:
- Loop through 4 iterations to create 4 radio buttons.
option = tk.Radiobutton: Creates a radio button for each option.self.options.append(option): Adds the radio button to the options list.
self.update_question(): Calls the method to update and display the first question.
register_user_profile Method
    def register_user_profile(self):
        user_name = input("Enter your name: ")
        self.user_profile["Name"] = user_name

        # Capture user picture using the webcam
        self.capture_user_picture()
- User Registration:
user_name = input("Enter your name: "): Prompts the user to enter their name.self.user_profile["Name"] = user_name: Stores the entered name in the user profile.self.capture_user_picture(): Calls the method to capture the user’s picture.
capture_user_picture Method
    def capture_user_picture(self):
        cap = cv2.VideoCapture(0)
        ret, frame = cap.read()
        cap.release()

        if ret:
            timestamp = datetime.now().strftime('%d_%B_%Y_%H_%M_%S')  # Modified timestamp format
            formatted_timestamp = datetime.now().strftime('%dth of %B %Y time %H:%M:%S')
            # Specify the directory to save user images
            user_images_directory = r"C:\Users\Ahammed.Shoyeb\AppData\Local\Programs\Python\Python311\Code\Results"
            ##C:\Users\Ahammed.Shoyeb\AppData\Local\Programs\Python\Python311\Code

            picture_path = os.path.join(user_images_directory, f"user_picture_{self.user_profile['Name']}_{timestamp}.png")
            cv2.imwrite(picture_path, cv2.cvtColor(frame, cv2.COLOR_BGR2RGB))

            # Overlay timestamp on the image
            image_pil = Image.open(picture_path)
            draw = ImageDraw.Draw(image_pil)
            draw.text((10, 10), f"Name: {self.user_profile['Name']} | Time: {formatted_timestamp}", font=self.get_timestamp_font(), fill="purple")
            image_pil.save(picture_path)

            self.user_profile["Picture"] = picture_path
        else:
            print("Error capturing picture.")
- Capture User Picture:
cap = cv2.VideoCapture(0): Opens the webcam.ret, frame = cap.read(): Captures a frame from the webcam.cap.release(): Releases the webcam.- If Picture Captured:
if ret:: Checks if a picture was successfully captured.timestamp = datetime.now().strftime('%d_%B_%Y_%H_%M_%S'): Generates a timestamp for the filename.formatted_timestamp = datetime.now().strftime('%dth of %B %Y time %H:%M:%S'): Generates a formatted timestamp.- Specify Directory and Save Picture:
user_images_directory: Specifies the directory to save the picture.picture_path = os.path.join(user_images_directory, f"user_picture_{self.user_profile['Name']}_{timestamp}.png"): Constructs the file path for the picture.cv2.imwrite(picture_path, cv2.cvtColor(frame, cv2.COLOR_BGR2RGB)): Saves the picture in the specified path.
- Overlay Timestamp:
image_pil = Image.open(picture_path): Opens the saved image.draw = ImageDraw.Draw(image_pil): Prepares to draw on the image.draw.text((10, 10), f"Name: {self.user_profile['Name']} | Time: {formatted_timestamp}", font=self.get_timestamp_font(), fill="purple"): Draws the text on the image.image_pil.save(picture_path): Saves the modified image.
self.user_profile["Picture"] = picture_path: Stores the picture path in the user profile.
- Error Handling:
else: print("Error capturing picture."): Prints an error message if capturing failed.
get_timestamp_font Method
    def get_timestamp_font(self):
        return ImageFont.load_default()  # You can customize the font here if needed
- Get Timestamp Font:
return ImageFont.load_default(): Returns the default font. This can be customized if needed.
update_question Method
    def update_question(self):
        if self.current_question_index < len(self.quiz_data):
            current_question

Android Version Of the Python MCQ Quiz Game
